
Take a Tour of Our School’s Makerspace
I’ve shared lots of small details of our makerspace so far in our first year, including examples of World Language projects, examples of primary grades projects, space design details that have proven important and surprising and unexpected needs. I’ve even shared lots of details about other makerspaces I’ve visited.
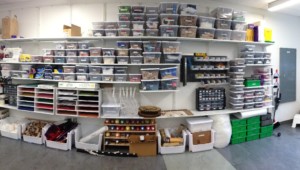
But I’ve never shared what our makerspace looks like in its entirety. So here we go!
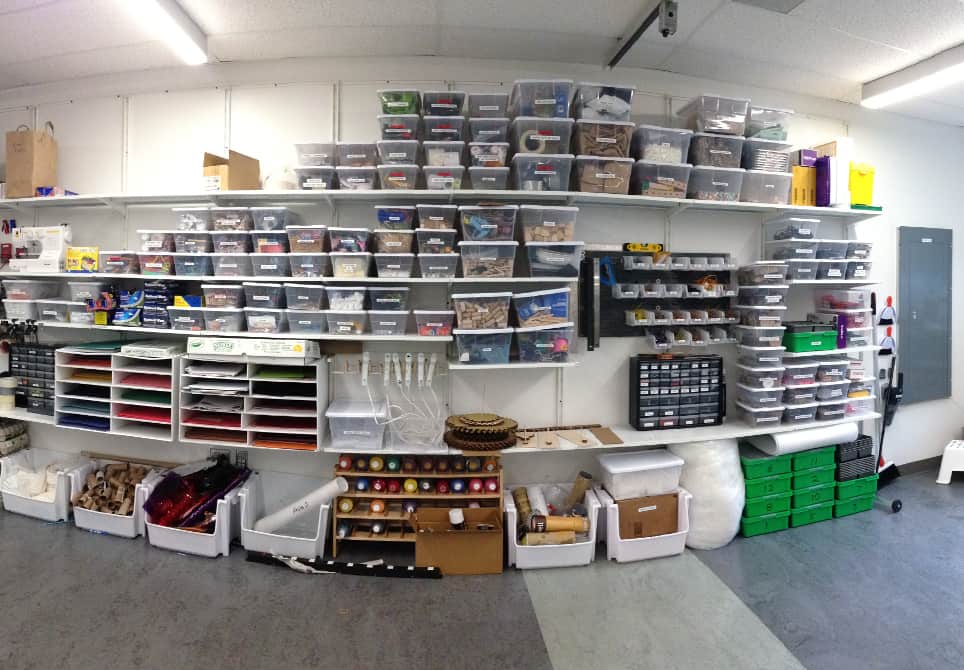
We have three rooms (although two of the rooms are separated by a divider wall that is almost never closed): the woodworking room and then the large combined digital and main rooms. The floor plan below shows the layout, including the views of the panorama photos further down in this post. For example, in the purple spot labeled “Photo #1,” I took that photo standing at the corner of the arc, and the panorama spans the full arc.


Photo 1. This picture starts in the digital room. Most students enter the door in the far north wall, at the edge of the digital space and just out of sight to the left in this picture. You can see out the windows into our school courtyard to the left, and the greenscreen corner on the right. The white door on the left side leads into our tiny DIY soundbooth–plywood, carpet and audio foam.
At first, several of our students (apparently having never seen an actual computer tower before) thought that each computer in the digital space had its own 3D printer. Others were confused why the computer didn’t turn on when they pressed the monitor button. Nope, those colorful towers are the actual computers.
Looking past the carpet into the far room, you can see the main room where most of our tinkering and testing takes place.

Photo 2. The next picture starts about halfway through our digital room, past the computers and near our teacher workspace. Those shelves on the left house some mostly “teacher use” tools like a button maker and our ancient Accucut. Above those shelves hangs awesome artwork created by an eighth grader during Adventure Days and our to-do grid, where we post and organize all our tasks that need to get done.
The shelves on the right are my colleague’s and my personal shelves, as well as where we keep things like digital cameras and rechargeable batteries. (See photo inset in lower right-hand corner above for an example of why we keep rechargeable batteries secure.)
The table in the center is the “finished lasercuts and 3D prints awaiting pickup” table. We’re working on developing a better system for returning such projects to students in an organized way.

Photo 3. I took the third picture standing between the two rooms. There are a few seventh and eighth graders at work on various projects in the main room, my colleague working on some BreakoutEDU boxes at our teacher workspace and two seventh graders on the far right filming a greenscreen video.
Right in the middle is the folded-up divider wall that we can use to separate those two rooms if needed.

Photo 4. This is now solidly inside our main room with its vinyl floor, ceiling-mounted electrical outlets, rolling tables designed and built by a teacher colleague and the glorious Wall Of Joy (more details about this in Photo 5). This picture was taken the day prior to Photo 3, but similarly shows one of our oldest students at work on an open-ended project where students could decide whether and how to use our makerspace to move toward their learning goals.
The far right leads back into the digital room, and the far left leads into the separate woodworking room. Along the wall into the woodworking room are our wall file for cereal-box cardboard, 3D printers, time timer, soldering stations and a few other tools. Under the windows on the right is our projects-in-progress storage space.

Photo 5. More about the Wall Of Joy shown above. We recently reorganized and color-coded the Wall Of Joy. When students were looking for or putting away items, we used to need to say things like “the scissors belong over there on the left, near the sewing machine. No, not that far. Down a little bit.” Now, we can simply say “yellow section!” Even only a few days into this reorganization, searching is easier. There’s also now no question of which items students may not access without asking.
We use a combination of standard organizational systems (i.e., bins and shelving, louvered panels and hooks) and hacks like the drying rack we use to store alligator clips and the shoe rack we use to put away hot glue guns without needing to let them cool first. The “cardboard specialties” section includes things like pre-laser cut cardboard shapes and gears and 3D-printed cardboard rivets.
On the far right in this image, you can also see our clean-up nook. We’ve found velcro tape exceptionally handy! Our upright brooms, hand brooms, hand vacuum and magnetic sweeper are all mounted on the wall.

Photo 6. Finally, this is our woodworking room at the far south end of the makerspace (yes, I tidied it up a bit for the picture!). Here we have our laser cutter on the far left, and then our woodworking equipment. Our drill press gets the most use by children, and our miter saw gets the most use by adults.
The furniture was all made in-house. One of our wonderful facilities colleagues designed the A-frame materials rack near the laser cutter and the two work tables in the center (that I helped build during two exhausting days last fall). Those work tables also serve as materials racks for non-cardboard laser cutting materials like craft plywood, acrylic and resin sheets.
The same colleague also designed the miter saw table under the windows and middle school students helped build it during Adventure Days last year.
Photos 7-10. The following pictures were all taken from the same location to highlight the flexibility of our space. Since our tables roll as well as nest together tightly in the corner, we can use them differently depending on the project and the developmental needs of the students doing the project.

Photo 7. With our youngest pre-kindergarteners, I limit the scope of materials and set up “materials tables” that they can access freely. I also like to bring over the seating cubes from the digital space for the tiny kids to use as work tables.
In the picture above, you can see the two materials tables near the Wall Of Joy, and then the seating cubes in the foreground, with a pre-kindergarten class hard at work on their bat ears.

Photo 8. The image above shows a first-grade class–students who are a little older, a little taller and have better fine-motor skills than those in Photo 7. I also generally limit the scope of their materials and tools with “materials tables,” but with a wider variety of options. This class is building board games to practice their French vocabulary – a project we expected to require constant return trips to the materials tables to try new things.
With lots of moving around expected, we did not set out the rolling stools for this class. The image on the left is the same view as the others in this part of the series. The image on a right is just a little bonus. The next day, we set up two extra game-play tables for kiddos who finished.

Photo 9. This third-grade Spanish class is decorating their Dia de los Muertos skulls with felt-tipped markers and Model Magic accents they created on a previous visit. Because this is a project that definitely would not require kids to be moving around a lot, we brought out the rolling stools. So far, I start letting kids make their own choices about rolling stools in about fourth or fifth grade, depending on the situation.

Photo 10. This final picture shows the entire fifth-grade class–all 50 of them! They’ve been studying water quality and the impact of road runoff on our local streams, and they came into our makerspace to build, test and iterate upon their filter designs.
With so many students, we set up only a few tables for their main materials and one table for a group that needed electricity since a hot-plate was part of their design. The rest of the students took sheets of cardboard to use as drop cloths and worked on the floor. In fifth grade, students can access materials and tools on the wall independently.
Our whole school community is pretty proud of how our space has turned out, after years of preparation, construction and now iteration as we continue to learn. We know we have lots of improvements to make–our homemade tables have some major tweaks needed, and our processes for students submitting files for laser cutting or 3D printing could be streamlined.
Our makerspace and its integration into the life of our school is an excellent example to our students of a project under constant iteration and improvement, just like the learning experiences we drive them towards.
For more, see:
- 3 Tips For Building a STEM Classroom Makerspace
- Prepping a Learning Space to Grow into a Makerspace
- What Happens When You Combine a Writer’s Workshop and Makerspace?
Stay in-the-know with all things EdTech and innovations in learning by signing up to receive the weekly Smart Update.


0 Comments
Leave a Comment
Your email address will not be published. All fields are required.