Start a Student-Generated Knowledge Bank
Have you ever finished a day of teaching completely exhausted while your students dance out the door, into the parking lot, onto the buses, and all the way home? If so, you are doing all the doing while your students are not. Unless, of course, you count their texting.
Let’s reverse that trend. Let’s start an online student-generated knowledge bank that you can use after any lesson . . . possibly even after all your lessons! You only have to set it up once and then do some occasional moderation. The students will do the rest (the actual heavy lifting), while you wean yourself off the caffeine drip, 5-hour energy drinks, and nervous pills.
We will use a Google form (it’s like a survey) and Google spreadsheet for this. (When you create a Google form, it will automatically generate the spreadsheet that collects the submitted data.) The spreadsheet will become an online document that showcases student knowledge that can be reviewed (like a study guide) by classmates, peers, and parents. We know that students will do assignments good enough for their teachers, but they will do them flat-out good for their peers.
Keep in mind that our students are Generation Z students, so they like to set trends, curate, mix, rate, and “like” things. We’ll do a little of all that here.
If you’re not familiar with Google forms, here’s a short tutorial.
Here’s how this will work. After any lesson, have students submit something that they learned on the Google form that you create. That data will be dumped into the Google spreadsheet. You can make that spreadsheet a public document that anyone can see or you can limit access to specific people. For this lesson, I have it set as a public document, and I post the link for students to see. (Students will ultimately have two links. They will submit on the form link, and they will view the data on the spreadsheet after you publish it.)
Here’s my sample form for students to submit to the knowledge database.
Here’s my setup on the form:
- Students first choose a category for their submission based on class objectives. This helps them establish what their objectives are and how they relate to what they are doing.
- Next they enter a chunk of knowledge. It should be in their own words, and not just a copy and paste job. I can be something on the micro or macro level. I prefer the deeper dive.
- Now the students will curate what they learned by adding to it . . . making it better or more defined or refined. They can do this by finding additional information on the net. “Find something cool and relevant” should be their directions. Have them supply the URLs to what they find. You can also use the curation field to have students explore the higher end of Bloom’s with analysis and evaluation.
- Next the students should “tag” their submission. This is a deeper dive on categorization, and an essential part of how today’s web works. They should think of this as the DNA for their chunk of knowledge.
- Let them get some public credit through a username, one that you approve. No room for “CheaterGirl55” or “MommasThugDummy.” Have them learn and appreciate some digital citizenship.
- Have them enter your last name. You might share this with other teachers, and you can sort by your name to see what your students have done.
Once you create your form, click the link for Live Form. This is the link that you will share with students to submit their knowledge. Check out that sample form again.
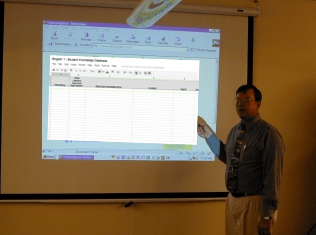
Here’s what the Google spreadsheet looks like when students submit data:

Students can submit from a home computer or smartphone. If you’re wired in your classroom, you can even put the spreadsheet up on your projector and let students see their submission live.

Lastly, I like to create a second sheet (directions below) on that same Google spreadsheet that I use to publish student submissions to the web. This gives me a chance to moderate the information before it goes public. The data they submit is unfiltered, and you will no doubt receive duplicate information. To make this a useful database, you will want to clean that up a bit before you publish it to the web.

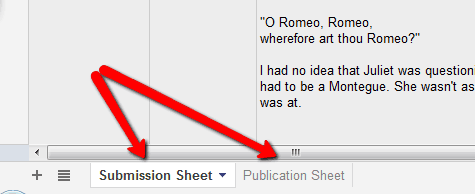
The data the students submit dump directly into the first sheet on the Google spreadsheet. This sheet has live data coming in, and it might not be suitable for publication. In my example, I retitled that sheet “Submission Sheet.” To create a second sheet, click on the + tab at the bottom of the spreadsheet . I renamed that second sheet the “Publication Sheet.” I copy and paste the best submissions to the Publication Sheet, and publish that sheet only for the world to see. I try to get each student on the published page, even if they have to resubmit.
To publish your spreadsheet to the web, click on the “File” link on the top left of the Google spreadsheet and then click “Publish to the Web.” This will generate a new link, a link that allows others to see the submitted data. You will have options to choose which sheets to publish and which cells. Again, I publish the Publication Page.
Viewers can sort and search on the published page, making it a handy study guide. Over time, this knowledge bank will become very robust, detailed, and thorough. I use the Submission sheet to track student participation.
Next time we will take a look at creating student-generated test questions.


0 Comments
Leave a Comment
Your email address will not be published. All fields are required.